Installation Video

Table Of Contents
1. Credits
2. Known Issues
3. Browser Compatibility
4. Upgrade Information
5. Installation
6. The Functions/Scripts
Credits
ColourMod was created, designed and programmed by Stephen Hallgren and Concept Developers.
Known Issues
• Any styles that needs to be modified should be in the first stylesheet that is included.
• Stylesheets included using the @import method are unable to be read.
• Shared styles are not compatible:
				#idname01,	#idname02 {

				…shared rules here…

				}
Compatibility
ColourMod is compatible with the following browsers:
• Safari 1.2.4 and later
• Mozilla Firefox 1.0 Mac/Windows and later
• Mozilla 1.6 Mac/Windows and later
• Internet Explorer 6.0
Upgrade Information
If you are upgrading ColourMod from v2.1 to v2.2 the only files you will need to overwrite are the ColourModScript.js and StyleModScript.js files. You will not need to update anything else.
If you are upgrading from a version older than v2.1 you will need to follow the manual instructions carefully as there as some significant changes.
Installation
This installation is for ColourMod Plug-And-Play versions only. Upload the colourmod folder onto the server. Make sure you put it in the root with the folder name "colourmod". If you don't you'll have to change a bunch of links.
The Functions/Scripts
Script Includes
Place there three lines of code within the <head> tags the page using ColourMod.
<link href="/colourmod/ColourModStyle.css" rel="stylesheet" type="text/css" />

							<script src="/colourmod/StyleModScript.js" type="text/JavaScript"></script>

							<script src="/colourmod/ColourModScript.js" type="text/JavaScript"></script>
Place this line at the very beginning of the <body> tag:
<div id="ColourMod"><?php include_once(”path/to/colourmod/index.php”); ?></div>
If you are not running PHP you can copy and paste the code from the colourmod/index.php file and put it inside the <div id="ColourMod"></div> tag instead.
pickcolor()
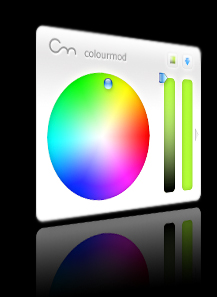
This piece of code is what opens the ColourMod window and controls what styles, fields and cookies get updated. There are 7 different variables that can have data in them: Classes, elements, cookie, fields, this, adjX and adjY.
You would pass the variables in this order:
pickcolor(classes, elements, cookie, fields, this)
A sample code to implement this is as follows:
<a href="javascript:;" onmousedown="pickcolor( '#leftcolumn p', 'color', true, '', this)" title="View ColourMod Demo">View Demo</a>
Classes (mandatory) - For this variable you will specify the class or classes that you want modified. Each class that you choose NEEDS to be in the stylesheet. Classes can be called by tag (eg. body), by class (eg. .className) and by id (eg. #idName). If you want to specify more than one class you can separate them with a semi-colon.
Elements (mandatory) - For this variable you can specify any standard CSS element name. Unlike the classes, an element DOES NOT need to be declared in the stylesheet.
You will want to note that you will have to use the Javascript elements. A good resource can be found at http://codepunk.hardwar.org.uk/ajs30.htm
Cookie (optional) - Determines whether you want to set a cookie or not when a color is selected. If you want to set a cookie then you will put “true” for the value. If you don’t you can leave it blank or enter “false”. To harness the power of cookies you will need to call the cookiecss() function as described below.
Fields (optional) - The fields variable refers to textfields that you want to update with the selected hex value. The value you will use for this is the ID of the textfield that you want populated.
This (mandatory) - Do not change this whatsoever.
adjX (optional) - Will offset the ColourMod window by the amount given.
adjY (optional) - Will offset the ColourMod window by the amount given.
cookiecss()
If you are setting cookies you can update the page on page load to display the last color that was selected. If fields are being used this will also update the field with the Hex value.
To implement this function you will need to put it in the <body> tag.
<body onload="cookiecss()">
changecss()
This function is the core of Colourmod. Calling this function you can update anything you'd like within a stylesheet. You can modify text size, font face, borders, etc.
You would pass the variables in this order:
changecss(classes, elements, values, modifiers, cookie, fields)
A common implementation of this is to attach it to the textfield that you want to be populated with the Hex values of the color selected. The purpose of this is to allow the user to manually type in hex values and watch the results in realtime.
<input id="hexValue" value='759564' onkeyup="changecss('body', 'backgroundColor', this.value, 'hex', false, 'hexValue');"/>
This will update the <body> tag’s background color every time a key is pressed. Here is an example of updating font size:
<input id="fontSize" value='12' onkeyup="changecss('p' ,'fontSize' ,this.value, 'px', false, 'fontSize');"/>
Classes (mandatory) - Same usage as openwindow()
Elements (mandatory) - Same usage as openwindow()
Values (mandatory) - Value that the element will have. This can be 10px, 10ems, 10, Arial, etc.
Modifiers (optional) - This value is beneficial if you have an input box for the value and a dropdown for the type of units you want. If a modifier is specified the “Value” will be combined with the “Modifier”. So if you specified 10 for the value and px for the modifier it would combine together to be 10px. As special exception to the rule is if you want to update with a hex value you can put “hex” in the modifier section. This will add the “#” to the beginning of the “Value” instead of at the end.
Cookie (optional) - Same usage as openwindow()
Fields (optional) - Same as openwindow()


